Publishing
What is the publishing feature?
Ah, the mystical “Publish” button – the gatekeeper between your game and its glorious public debut! As you’ve surely noticed, any game you’re tinkering with in your account stays tucked away in a private little corner of Lemonate. Why? Because only published games are showcased for the world to enjoy on the Games page. The same rule applies to assets, by the way (you’re not special, assets!).
To publish your game, open it in the editor and keep your eyes peeled for the “Publish” button in the menu bar. Publishing is a quick and straightforward process, but hold your horses – there are some rules and gotchas to keep in mind.

Look, the magic button is right there!
Getting dependencies ready for publishing
When you open the publishing dialog, the system will do its best Sherlock Holmes impression and meticulously scan your project’s dependencies. And here comes Rule #1: All meshes, textures, scripts, and other items that make up your project must live within your project’s folder.
Now, let’s talk about those cheeky assets from the asset store. They’re often just referenced in your project, meaning they’re fetched from the store whenever you load your game. That’s convenient during development but poses a problem when publishing. Why? Because your game would depend on the existence of external assets that might suddenly vanish or (gasp!) be modified by their owner.
The solution? Copy those external assets into your project folder before publishing. Luckily, the publishing dialog will nag–err, helpfully remind you to do this. Just hit the button to copy the assets, and voilà! Your project is one step closer to glory.
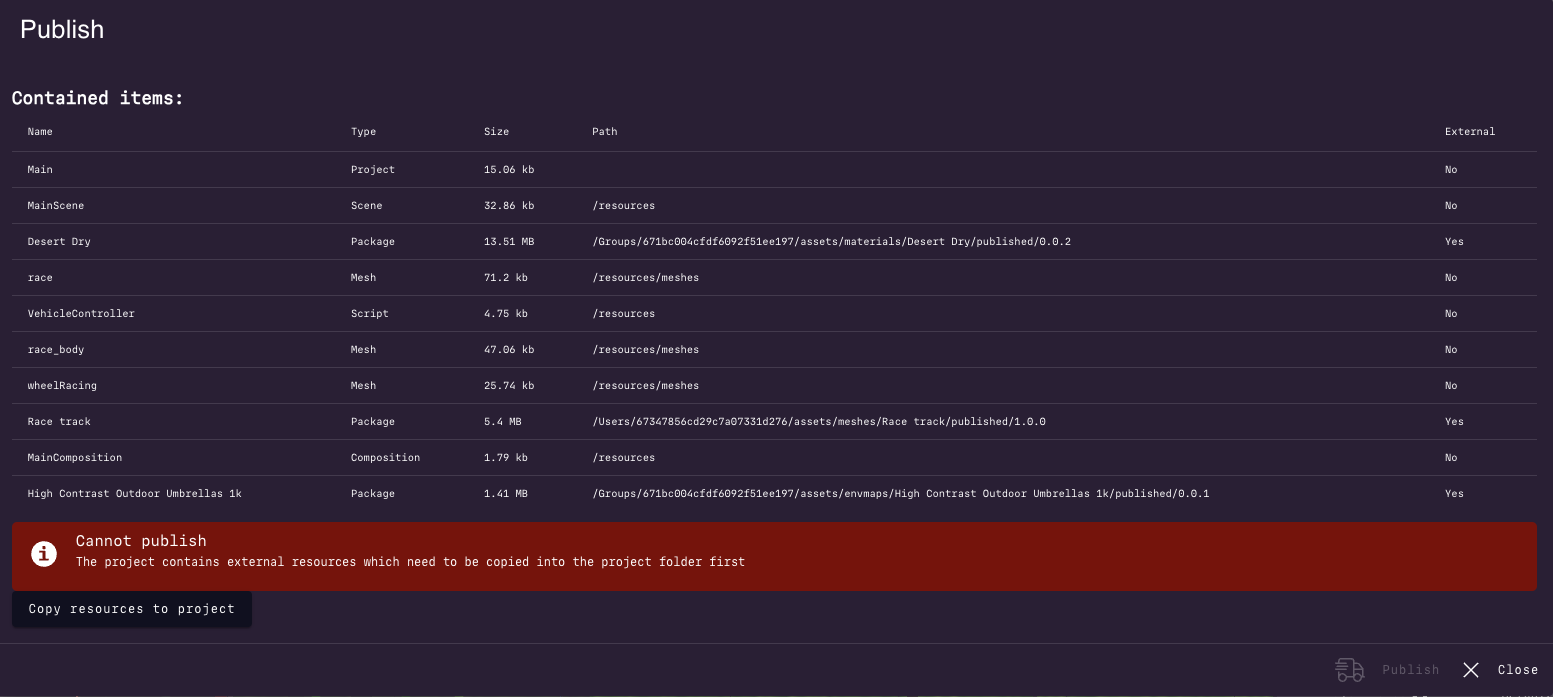
“Houston, we have external dependencies!”
Game versions should not be ambiguous
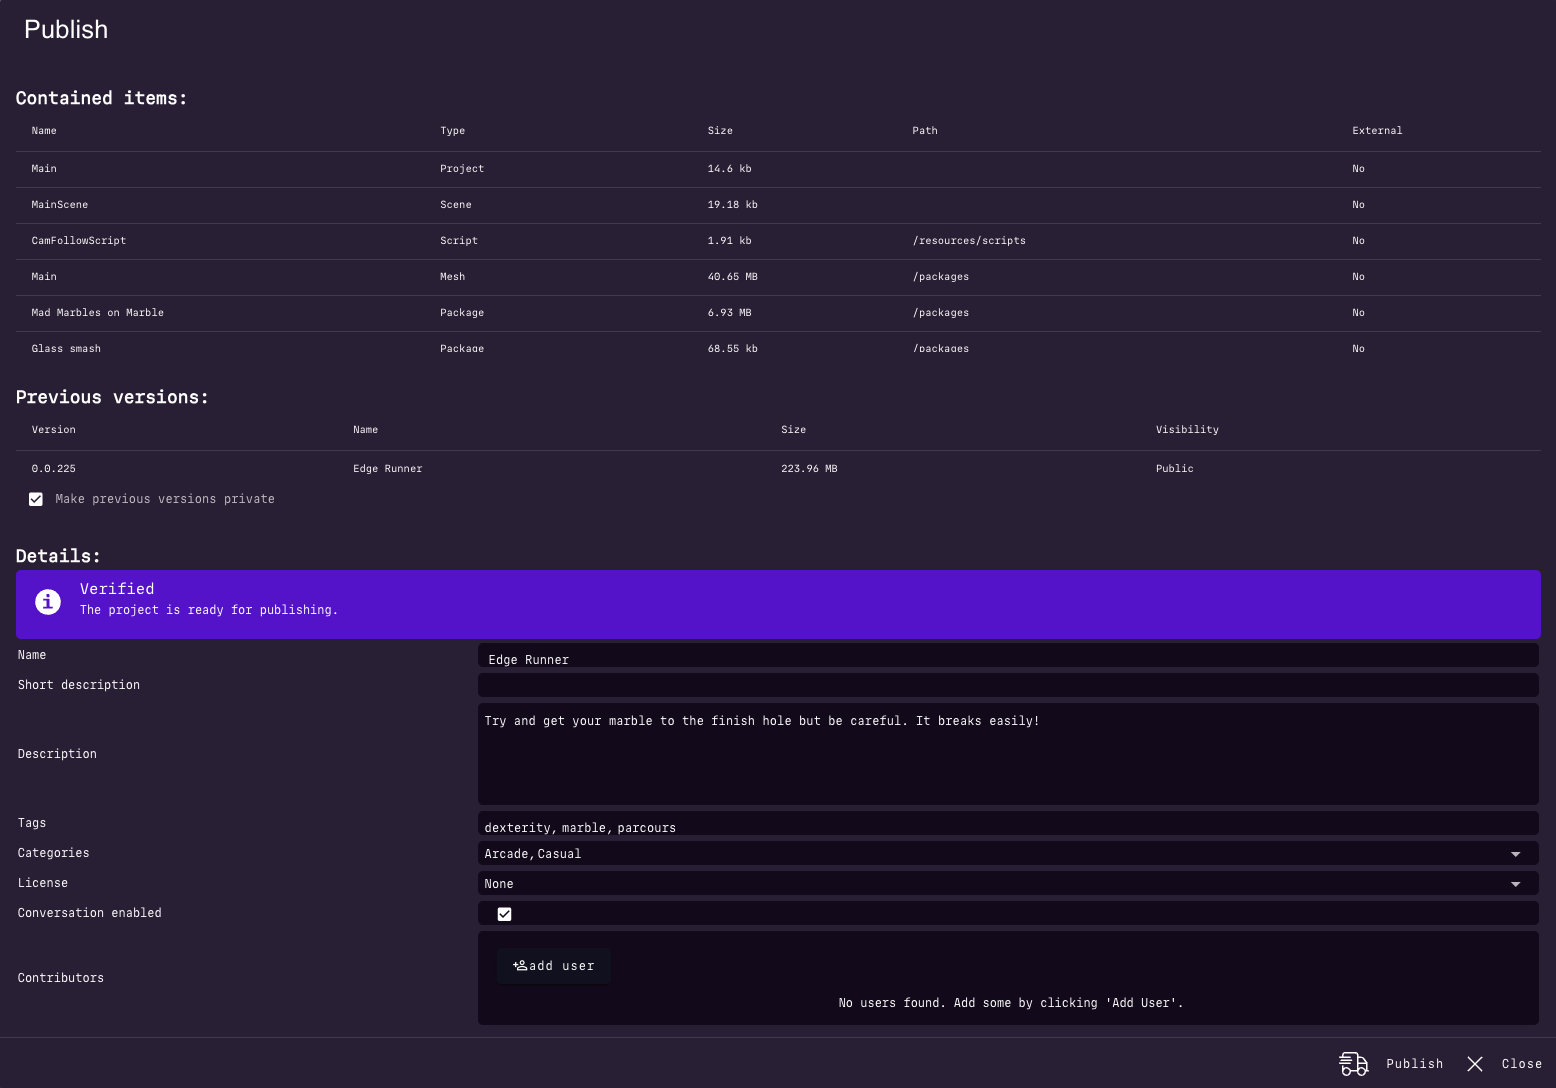
Rule #2 of publishing: Avoid creating a time-space paradox on the Games page by spamming it with multiple versions of your game. Here’s how it happens: every time you publish, Lemonate packages your game in its current state, assigns it a version number, and saves it in the published folder within your project. Each new publish creates a new version folder. It’s all neat and tidy… until you forget to clean up.
If you’re not careful, players will be greeted with a buffet of different versions of your game all titled “Awesome Game”. Chaos ensues.
To prevent this, the publishing dialog will kindly force you to either:
Make previous versions private (so they don’t clutter the public listing), or
Change your game’s name if you really want multiple versions (e.g., “Awesome Game 2.0”).
You’re welcome, future players.
Filling information before publishing
Before you hit that shiny “Publish” button, take a moment to fill in the game’s information. Trust us – people want to know what your game is about before they dive in.
Make sure to:
Write a good description (especially if your game lacks in-game instructions – we’re looking at you, minimalist developers).
Add some relevant tags to help players find your masterpiece.
Choose a license if you’re feeling legally inclined.
Once everything’s set, hit “Publish.” In a few moments, your game will be live, ready to dazzle players around the world. Don’t forget to celebrate – maybe treat yourself to a cupcake or something.
“Mission control, we’re go for launch!”